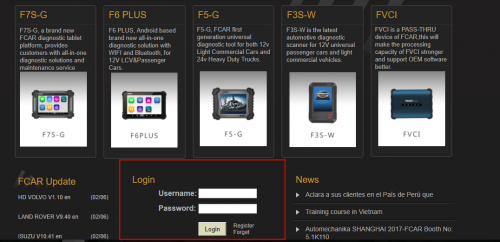
1. Type www.fcar.com into your web browser
2. Scroll down until you see the space to log in to your account
If you do not have a username and password, please create one now by clicking the register link
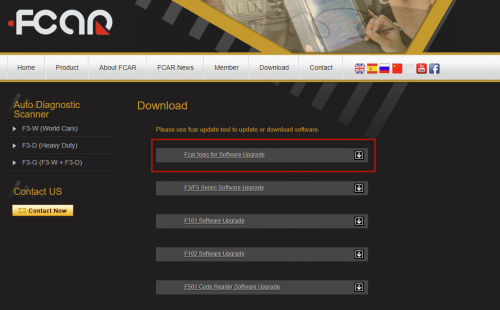
3. Once you successfully log in to your account, click the gray Download tab at the top of the page.
4. This will take you to the downloads page. Click the gray box that is titled "Fcar tools for Software Update"
5. A download bar should pop up at the bottom of the page
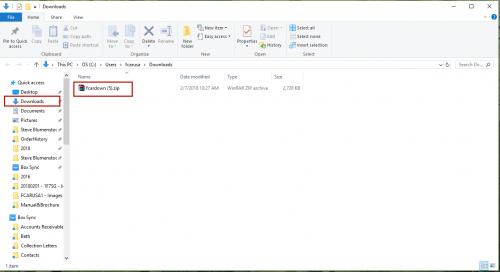
6. Doubel Click fcardown.zip
7. If download bar is not at the bottom of your screen, go to File Explorer and click Downloads on the left hand side
8. Double click on fcardown.zip
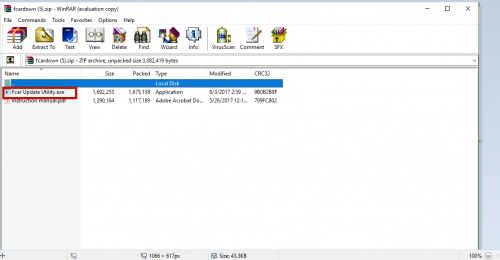
9. This should open a new page
10. Doubel click on Fcar Update Utility.exe
11. If a security warning pop up occurs, press yes or continue.
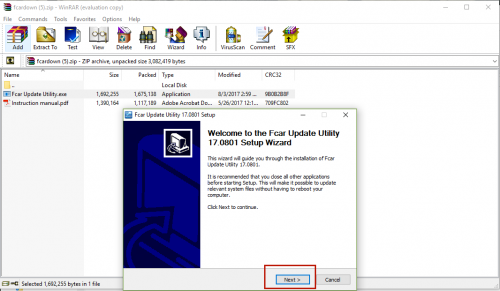
12. A new window will open titled Fcar Utility Update Setup. Please press Next
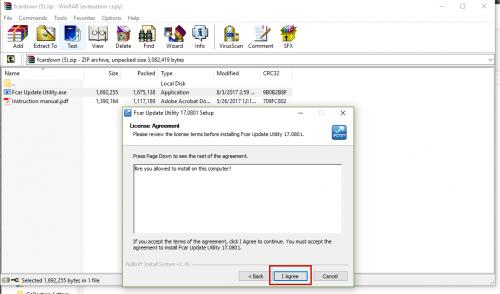
13. Next, Press "I Agree" for the License Agreement
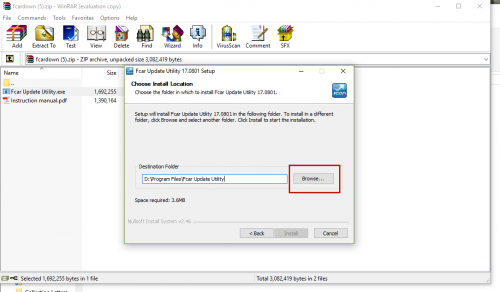
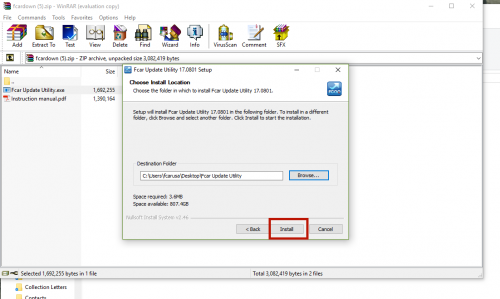
14. Please choose Browse on the Choose Install Location Screen
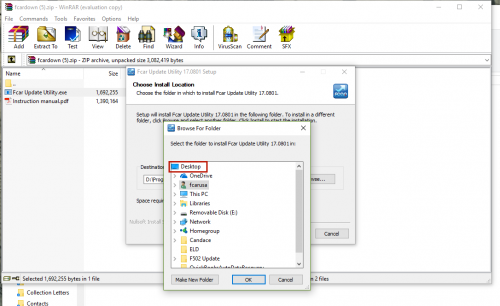
15. In the list available, Choose Desktop and press OK
16. The destination folder should now read Desktop/Fcar Update Utility, Then press Install
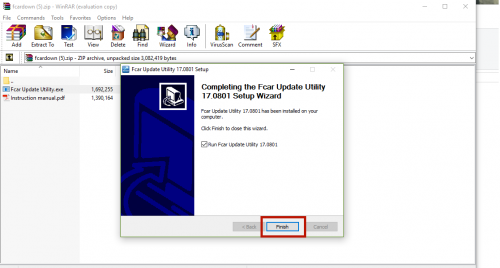
17. Once it is finished downloading, press Finish
18. If the program does not open on its own, go to your desktop and doubel click on the Update Utiity Icon
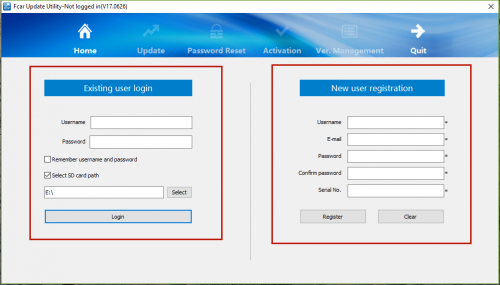
19. Once the Utility Software has opened, Enter your username and password information that you use for the fcar website.
If you do not have one, complete the new user registration. Then Click the Login Button
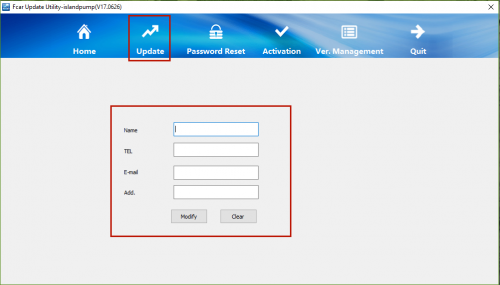
20. In the next screen, you will be prompted to enter your Name, Telephone, and Email. Once you have done this, Click on the update bottom at the top.
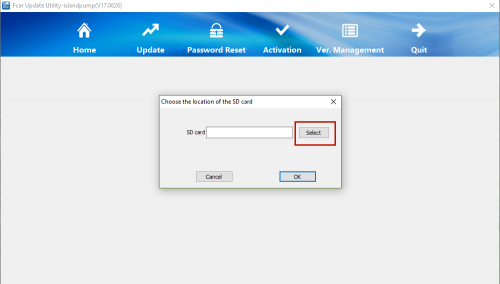
21. Click on the Select button to choose the location of the SD Card
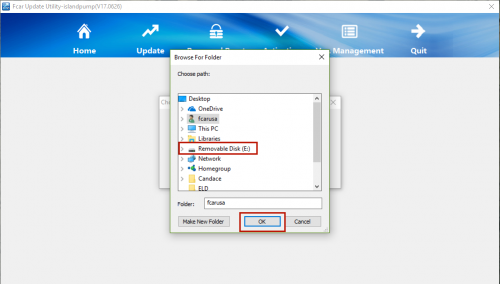
22. A menu list will be brought up, please look for "Removable Disk" It will also have a letter next to it (E:/ F: / K: / D:) Click this once, then press OK
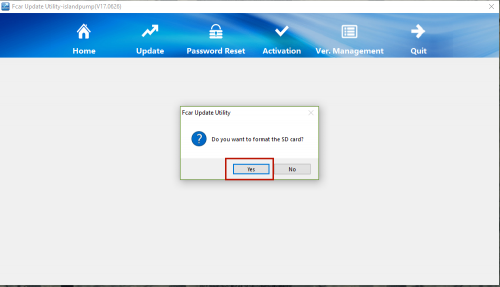
23. It will then ask you if you want to format the SD Card, Press YES
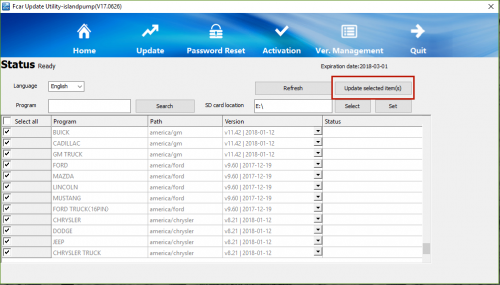
24. The next and final screen will be the update screen. Please click the button that says " Update selected Item(s).
25. After this is complete, please click finish.
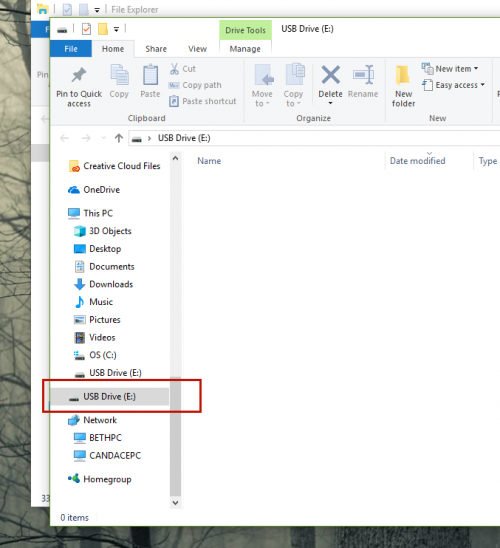
26. Open your File Explorer
27. Look for the Removable Disk on the left hand side. Click ONCE.
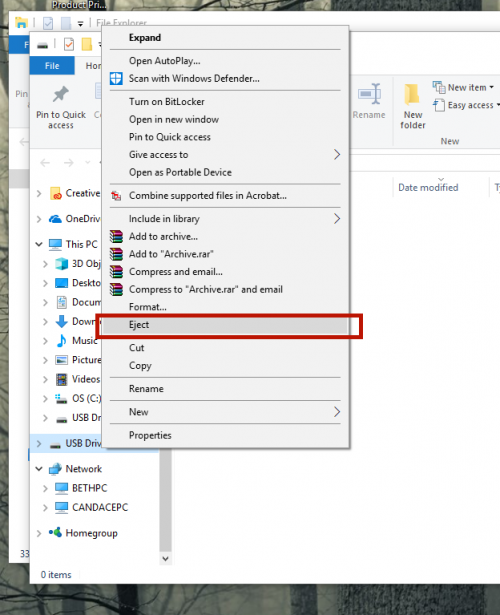
28. Righ click on the removable disk, click Eject on the pop up menu
29. You may now remove the SD Card from your computer and insert it back into your machine.
30. Power your scanner on, and press the settings button ( Cog & Wrench)
31. Click the Units Set up Option and change over to english by clicking the box
32. Press Okay and go back to the Settings Button
33. Click on screen calibration.
34. Small crosses will pop up in top left, bottom left, bottom right, and top right respectively. Please touch each one of these with your finger.
35. Software Update is complete! Please call our office if you have any issues

